


Every baseball player, from Little League to the big leagues, knows the importance of proper throwing mechanics. Throwing a baseball is a fundamental skill that can make or break a player's game. Perfecting the art of throwing doesn't happen overnight. It requires consistent practice, correct techniques, and yes, lots and lots of drills. Here at BRUCE BOLT, we believe that drills are the backbone of player development.
In this blog post, we are going to highlight some of our favorite youth baseball drills that will help young players refine their throwing abilities. We’ve carefully curated a set of drills, starting with some basics for muscle memory development and then transitioning into drills that incorporate real-game situations. Let's just say, we've got it all covered.
Basic Baseball Throwing Drills
In baseball, as with most sports, the payoff in skill comes from consistent effort. Before leaping into the detailed intricacies of the game, players need a strong foundation. This is where basic throwing drills become incredibly important. With a focus on technique, these beginner's exercises lay down solid muscle memory and form. Let's look at our top picks for these fundamental drills.
Long Toss Drill
The long toss drill is the baseball equivalent of bread and butter - simple but crucial. This throwing drill is primarily about getting the mechanics right, as it contributes to improving throwing accuracy and arm strength.
Step 1: Begin by partnering up with another player (or coach) and start standing close together. Warm up by having a slow-paced catch, loosening up the throwing motion, and engaging every part of your body that will be involved in the throw.
Step 2: Once you're warmed up and comfortable with the ball, you and your partner start stepping apart from each other. Once you reach a distance where the ball is barely reaching your partner without hitting the ground stay there for a while to get used to how you are leveraging your body to make this throw.
Step 3: Put a strong focus on the arc of your throw as you move farther and farther away. Remember, it's much mechanics, not how hard you're throwing the ball when you're moving out to greater distances.
Step 4: After attaining comfort at your maximum distance, begin closing the gap. At this stage, you can concentrate on throwing with greater velocity and keeping the ball on a line.
Knee Toss Drill
Need a drill to isolate the upper body and focus on proper shoulder rotation? The knee toss drill is your go-to. This drill is beneficial for players who struggle with their throwing mechanics.
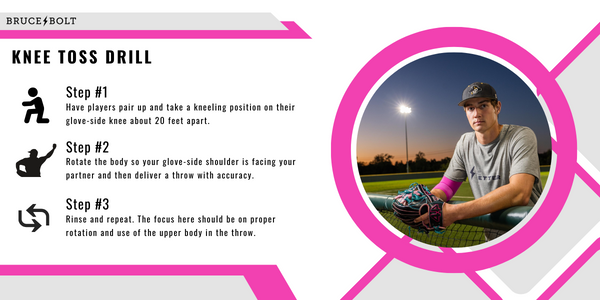
Step 1: Have players pair up and take a kneeling position on their glove-side knee, maintaining about 20 feet distance from their partner.
Step 2: Concentrate on rotating the body so your glove-side shoulder is facing your partner and deliver a throw with accuracy.
Step 3: Rinse and repeat. The focus here should be on proper rotation and use of the upper body in the throw.
Towel Drill
Traditionally a pitching drill, the beauty of the towel drill resides in its simplicity. Using just a towel, this throwing drill emphasizes the proper extension and release point contributing to power.
Step 1: The player holds a rolled-up towel (or a small hand towel) instead of a ball. With the throwing arm extended backward.
Step 2: The player performs the normal throwing motion. The towel will extend forward as the arm comes around as in normal pitch.
Step 3: The towel should snap forward at the end of the throw, indicating a good arm extension. If there's no snap, the player is likely short-arming the ball.
Step 4: Repeat multiple times daily to build the muscle memory of a good arm extension and achieve a consistent release point.
Stay consistent with these simple yet effective drills. Over time, they will help you refine your fundamental baseball skills, setting you up for more advanced drills down the line. Remember, success is a sum of small efforts, repeated day in and day out.
Baseball Throwing Drills: Incorporating Game Situations
Baseball is not just about developing individual skills, it also demands the application of these skills into various game situations. This takes us to the next set of drills that aim to simulate real game scenarios.
Field & Throw Drill
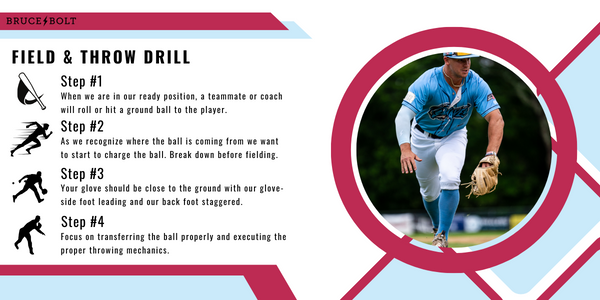
The beauty of the field & throw drill lies in its ability to translate throwing mechanics to ground ball situations. This drill will allow you to perform quick but accurate throws after fielding the ball.
Step 1: The players line up at the shortstop position, with a player or coach positioned at first base.
Step 2: Then, hit soft ground balls toward the fielder with a fungo hitter.
Step 3: Advise players to attack the ball. Each player should charge the ball, field it, and efficiently transfer it to their throwing hand.
Step 4: Upon fielding, the players fires the ball over to the 1st baseman, maintaining an emphasis on the proper throwing mechanics that were honed in the previous drills.
Having them field the ball one at a time allows coaches to give individualized feedback on throwing mechanics.
Double Play Drill
After working on the field & throw drill, move to the double play drill to work on a runners-on situation as opposed to bases empty.
Step 1: Line up the players in two single-file lines – one at second base and one at shortstop – in a fielding position.
Step 2: Hit ground balls to either side while the middle infielder who does not field the ground ball moves to cover second base.
Step 3: Upon fielding the ball, the player tosses it to his teammate at second base.
Step 4: Lastly and crucially, the player at second base receives the toss, quickly transfers the ball to his throwing hand, and delivers it to the first baseman for a double play.
Remember, the true strength of a team lies in the coordinated effort of all its individuals.
Crow Hop Drill
The crow hop drill is another important drill that adds power to the throw and ensures the player's momentum heads in the correct direction.
Step 1: Starting at the top of two circle cones in the outfield, the player hops twice with the left leg in the direction of the target and towards the front cone.
Step 2: After the two hops to the second cone, the player takes another jump-stride toward home plate but plants with the right leg, setting a solid base for lifting their left leg.
Step 3: Have the player launch the ball in rhythm, finally coming to a throwing position following the initial hops.
All outfielders (and really players in any position) should try to regularly repeat this drill. This not only enhances their outfield throwing skills but also helps the player develop muscle memory of throwing the ball using their whole body.
By combining these drills into your practice regimen and sticking to it, you can look forward to significant improvements in your in-game performance. Practice these with perseverance, patience, and a focus on the mechanics, and the payoff will come. Remember, consistency is key!
Useful Tips for Baseball Throwing Drills
With these simple, yet effective drills at your fingertips, you are well on your way to reaping the rewards of a better throwing technique and throwing motion. But before scaling up your practices, we’d like to share some pointers that will help you make the most of your training.

Be Consistent
The difference between a good baseball player and a great one is consistency. Your focus should be on consistently executing these drills. Gradual progress always reaps the best rewards. Patience and consistency are just as essential as the physical abilities.
Repetition
Another key indeed is repeating these drills regularly. It’s all about training your muscles to remember these accurate movements and that involves, you guessed it - practice, practice, and yet more practice.
Understand Your Movements
Make sure the players have a proper understanding of the purpose of each drill. These drills are designed to improve lower half stability, throwing distance, and fielding position. Make sure you are clear about what each drill is trying to achieve.
Use Your Resources
Remember, there's no harm in seeking help, especially when you're learning. So use videos on YouTube and blogs from BRUCE BOLT to get additional tips or to find more drills that target different baseball skills. In this digital age, the resources at your fingertips are numerous.
Remember to Rest
Lastly, don't forget to rest! Just as vital as working out is making sure you take the necessary time to recover. It allows your muscles to repair themselves and grow stronger. By incorporating enough rest into your training schedule, you don't risk overloading your body and potentially sidelining yourself with preventable injuries.
Remember, becoming a well-rounded baseball player is built brick by brick. With these tips in mind, now it's time to apply what you've learned. Now get out on the field - it's time to start training!
Around the Horn: Baseball Throwing Drills
At BRUCE BOLT, we do more than just offer you instructions on top-tier throwing drills. We provide you with unmatched batting gloves and other baseball gear to support and boost your play. This includes arm sleeves that help support blood flow through your arm in between plays.

Premium Arm Sleeves from BRUCE BOLT
Our arm sleeves (now capable of being customized!) are engineered using premium, breathable fabric that provides comfort and health benefits during play. These sleeves help keep your arm muscles warm and active, thereby reducing the risk of injuries. And if you know us, you know we are not just about functionality. Our arm sleeves come in several clean colorways, making sure you never are short of style when you step onto the field.