The Short Answer: Here are our favorite youth baseball drills for 9-10 year olds…
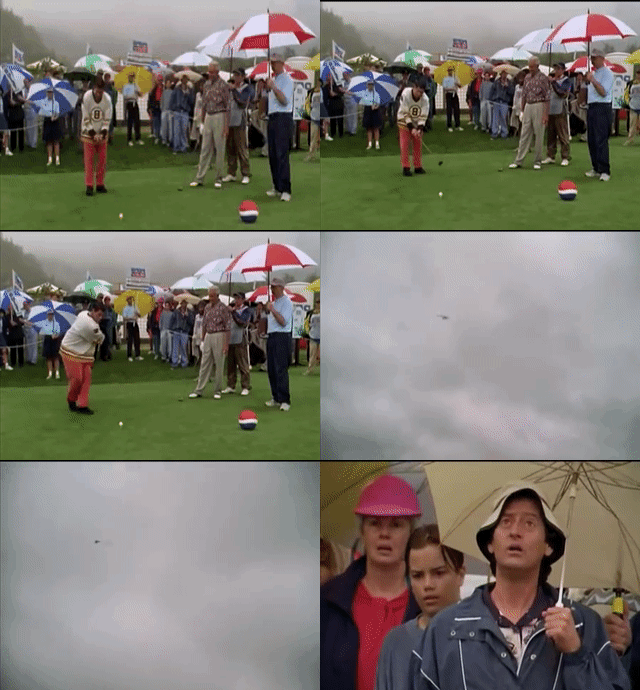
- Happy Gilmore Drill
- Stride Straight Drill
- Short Hop Showdown
- Zig-Zag Fly Ball Drill
- Load & Go Drill
- Wrist-Snap Release Drill
Baseball is more than just a game for many young players; it's a platform for developing discipline, teamwork, and essential motor skills such as hand-eye coordination. The key to enhancing a young player’s abilities lies in choosing the best drills. Tailored drills not only provide a fun and engaging way of learning but also help to build the physical and mental stamina crucial to make their Major League Baseball dreams a reality.
Today, we will be taking a closer look at our picks for the best baseball drills for 9-10 year olds. By incorporating these drills into their regular practice, young players can quickly improve their hitting, fielding, and pitching skills. Let's jump right in!
The Best Hitting Drills for 10-Year-Olds
Mastering the stride and overall swinging motion is the best way to improve a youth hitter's performance. Let's explore two of our favorite drills for this.
Happy Gilmore Drill
The Happy Gilmore drill is a fun approach to improving batting power. This exciting drill combines momentum and swing power to provide effective practice sessions. Ideal for tee sessions at home or on the baseball field, here is a simple guide:
- Enter the Box: Players start behind the batter's box and then step the back foot into the box, initiating forward momentum, a key element to a powerful swing.
- Front Foot Plant: Following the back foot, the front foot establishes power position, simulating the perfect batting posture.
- Drive & Swing: Next, players drive through the baseball, duplicating the hip motion needed for a strong swing.
- Practice Makes Perfect: Players should repeat this drill until they have mastered the movement.
What does this drill achieve? With practice, it significantly enhances hitting power and distance by emphasizing momentum shift through the swing.

Stride Straight Drill

Next, we come to the stride straight drill, an exercise for correcting improper striding toward the ball, commonly known as "stepping into the bucket". Here are the steps to follow:
- Get Set: Start with the correct batting posture as perfected in the stance drill.
- Stick or Tape: Position an alignment stick (or a line of tape) directly behind the player's feet. This will serve as a guide and corrective measure.
- Stride and Observe: The player should then perform the load followed by the stride motion. If the player ends up stepping on the stick or tape, it shows an incorrect stride.
- Repeat: Repeat until the straight stride is committed to muscle memory.
The stride straight drill helps young baseball players understand the importance of a proper stride in hitting. By consistently practicing this drill, they achieve a straight stride that improves hitting timing.
The Best Fielding Drills for 10-Year-Olds
Becoming a great fielder requires quick feet, soft hands, and speedy reactions. Excelling in fielding can often be the difference between winning and losing a game. To that end, we've chosen two fielding drills that are both enjoyable and effective for young baseball players.
Short Hop Showdown
Our first pick for fielding drills is what we like to call the short hop showdown. Emphasizing improving precision and control, here's how this drill works:
- Team up: Pair up players approximately 10 feet apart, with one player starting with the ball.
- Throw & Field: The player throws a short hop to their partner, who fields it and returns the throw similarly.
- Competition: Continue this alternation, counting successful transitions until one team reaches 10 points.
The short hop showdown is a fun drill that focuses on fielding short hops and choppy ground balls effectively, enhancing a player's quick reactions and ability to anticipate the ball's bounce.
Zig-Zag Fly Ball Drill

Next is the zig-zag fly ball drill, designed to enhance a player's ability to track and catch fly balls. The steps for this drill include:
- Set up Cones: Place four cones in a zigzag pattern, a few strides apart from each other, heading towards the outfield wall from home plate.
- The Drill: Start at the first cone in a ready position, and then drop-step towards the next cone as a coach tosses the ball into the air. Your goal is to track the ball while moving toward the cone. Secure the ball and drop it before progressing to the next cone.
- Switch Sides: As you move towards each cone, alternate between right and left.
- End Sprint: After the last cone, plant your back foot towards the tosser and sprint to finish the last part of the drill.
Continual practice of the zig-zag fly ball drill will help build confidence by improving the player's ability to track and catch fly balls from different positions and angles.
The Best Pitching Drills for 10-Year-Olds
For 10 year old players, becoming a great pitcher can be a huge obstacle. Not only did you just start with kid pitch a couple of years ago, but you are not far away from the mound moving significantly further from home plate in high school and travel ball. Let's explore two of our favorite drills that focus on different aspects of pitching technique.
Load & Go Drill

The first pitching drill we recommend is the load-and-go drill. This drill splits the pitching motion into multiple small parts focusing on balance and weight transfer to help pitchers enhance their velocity.
- Start at the top: Begin at the top of your pitching motion where your front leg is bent, and you're loading on your back leg.
- Replicate the motion: Repeat tapping your front cleat on the mound and moving your hands from under your chest to right below your belly button three times, all while maintaining balance and load on your back foot.
- Deliver the pitch: After the third tap, finish the drill by delivering a pitch to your catcher. The transition from the taps to the pitching motion should be seamless.
This drill helps younger players improve their load and the explosion to the plate, key components to increasing pitch velocity.
Wrist-Snap Release Drill

Next up is the wrist-snap release drill that emphasizes perfecting your release.
- Get into position: Start in the final position of your pitching motion where the ball is about to leave your hand.
- Pump the arm: Pump your arm towards the plate with your hand facing the ground three times, ensuring your balance and posture are maintained.
- Release and snap: After the third pump, release the ball from your final position. Make sure to focus on snapping your wrist and releasing the ball at the correct moment.
- Hold your position: Maintain your final position for three seconds to note your finishing posture.
The wrist-snap release drill improves the direction of the pitch and helps young pitchers focus on hitting the strike zone.
How BRUCE BOLT Can Help
Developing fundamental baseball skills in young players is a long process. These drills aim to improve the three key aspects of the game: hitting, fielding, and pitching. Repeatedly practicing these drills instills the right fundamentals for ultimate success in the sport.
However, effectiveness and safety also heavily rely on the gear used. That’s where BRUCE BOLT comes into play. Our products, designed to offer superior quality and durability, provide the utmost comfort and flexibility, freeing you up to focus on your game.
So what are you waiting for? Come shop our batting gloves, arm sleeves, and protective gear now!
